IDS peak 2.17.1 / uEye+ firmware 3.70
IDS Peak comfortSDK, genericSDK, IPL, and AFL developer manuals are external documents. Please contact us if you need them.
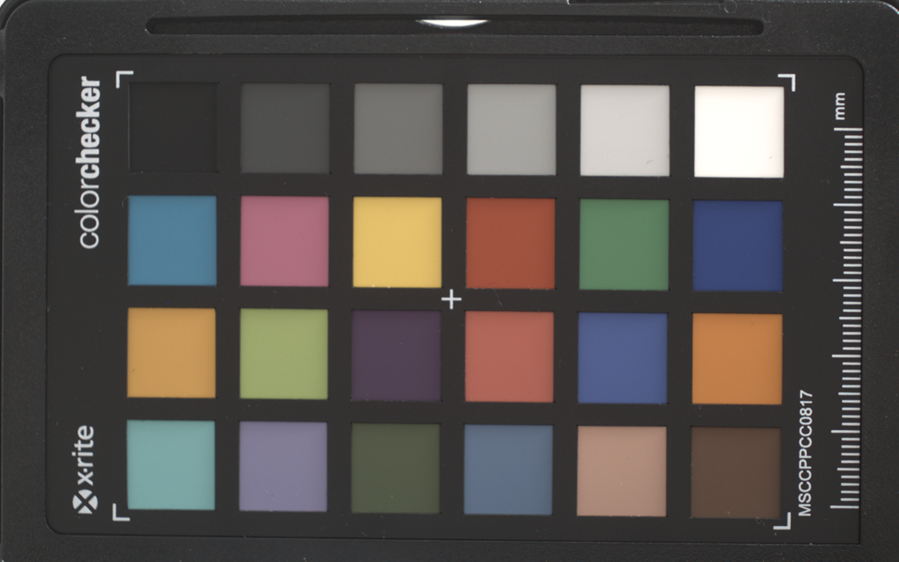
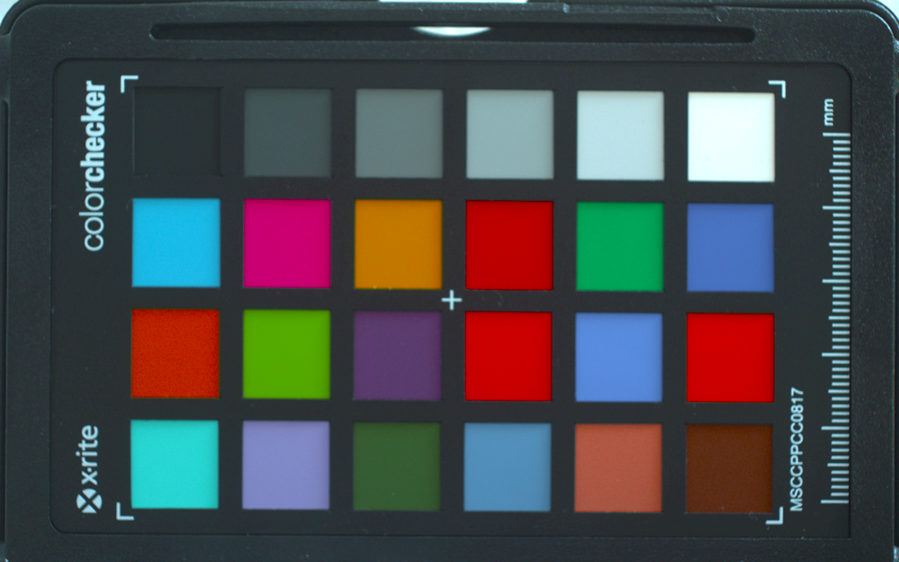
The spectral sensitivities of sensors, in combination with optical filters (e.g. IR cut-off HQ), do not correspond to the standardized color matching functions that are the basis for sRGB. If these "RAW" colors from the sensor are directly sent to an sRGB display, they look pale and unnatural. This can be adjusted by using a two-dimensional correction matrix, where each channel contributes to each final color value. Precondition: the image must be debayered, i.e. each color value must be known for each pixel. In order to get correct color values, the BlackLevel must be set to the value "0".

Fig. 113: Color checker target without color correction

Fig. 114: Color checker target with color correction
The color values are calculated with a 3x3 matrix, the so-called color correction matrix (CCM).
This can also be written as:
IDS Vision color cameras have a default CCM, that can either be used directly for color correction within the camera or for post-processing on the host side.
|
The color correction matrix is unique for each sensor sensitivity characteristic in combination with optical filters (e.g. IR cut-off "HQ") and standard illuminant. For IDS Vision cameras, the CCM refers to sRGB with D65 illuminant. |
Configuration
Choose a PixelFormat that enables debayering within the camera.
PixelFormat = RGB8;
Now you can enable color correction by setting ColorCorrectionMode to "Auto".
ColorCorrectionMode = Auto;
The current status of color correction can be acquired with ColorCorrectionStatus.
currentCCStatus = ColorCorrectionStatus.Entry;
Description |
|
|---|---|
Enabled |
Images are color corrected by the camera. •Color correction is enabled (ColorCorrectionMode = Auto) •PixelFormat is correct, i.e. debayering in the camera is active |
NotAvailable |
Images are not corrected. •Color correction is enabled (ColorCorrectionMode = Auto) •PixelFormat is not suitable, i.e. a RAW format is chosen. |
Disabled |
Images are not corrected. •Color correction is disabled (ColorCorrectionMode = Off) |
|
If debayering is located on the host side or not supported by the camera, the transferred images cannot be color corrected. In this case, color correction can be done in software, e.g. with the IDS peak IPL. See Applying color correction. |
Alternatives and variation: Custom color correction matrix (CCM)
You can adapt the color correction matrix to your scene, e.g. by taking into account different lighting conditions or optical filters. Even if color correction is located on the host side, you can use that custom CCM to make sure that the correct correction factors are used for each camera.
1.Choose the custom CCM:
ColorCorrectionMatrix = Custom0;
2.Now store your custom parameters to the camera. Use the ColorCorrectionMatrixValueSelector to point to the CCM value that you want to change:
ColorCorrectionMatrixValueSelector = Gain00;
ColorCorrectionMatrixValue = 2.0;
ColorCorrectionMatrixValueSelector = Gain01;
ColorCorrectionMatrixValue = -1.5;
ColorCorrectionMatrixValueSelector = Gain02;
ColorCorrectionMatrixValue = 0.5;
ColorCorrectionMatrixValueSelector = Gain10;
ColorCorrectionMatrixValue = -1.5;
ColorCorrectionMatrixValueSelector = Gain11;
ColorCorrectionMatrixValue = 2.0;
ColorCorrectionMatrixValueSelector = Gain12;
ColorCorrectionMatrixValue = 0.5;
ColorCorrectionMatrixValueSelector = Gain20;
ColorCorrectionMatrixValue = -1.0;
ColorCorrectionMatrixValueSelector = Gain21;
ColorCorrectionMatrixValue = -1.0;
ColorCorrectionMatrixValueSelector = Gain22;
ColorCorrectionMatrixValue = 2.0;
|
To maintain white balance, make sure the row sums of the CCM are approximately 1, as a rough estimate. |
3.Enable color correction:
ColorCorrectionMode = Auto;

Fig. 115: Color checker with HQ color correction

Fig. 116: Color checker with "Custom0" color correction
Additional information
Camera operation |
|
|---|---|
Camera feature reference |
|
IDS peak topics |
|
Vision Channel |
