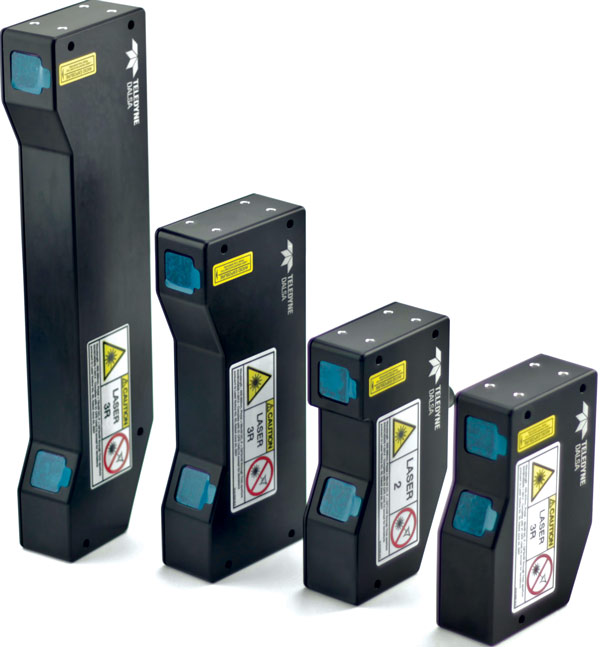
Teledyne DALSA's Z-Trak 3D laser profiler series delivers high resolution height measurements in real-time using laser triangulation techniques. These compact units feature powerful FIR-peak detector and are factory calibrated for rapid field deployment. The Z-Trak 3D laser profiler measures 10 to 1000mm Z-axis range with resolutions down to 5µm. Z-Trak produces highly linear and repeatable results by combining reflectance based dynamic laser power control and Scheimpflug optimized optical path. Z-Trak is available in multiple configurations.
All Z-Trak 3D laser profilers are factory calibrated for accurate real-time measurements, and built with IP67 enclosures for harsh envionments. With sophisticated algorithms and blue laser options for highly reflective surfaces, or red laser options for more complex surfaces, Z-Trak laser profilers proficiently handle virtually any 3D inspection task. Support for GigEVision standard enables the Z-Trak 3D laser profilers to work with both the Teledyne DALSA image processing and analysis software packages, as well as a wide variety of third party 3D image processing and analysis packages.
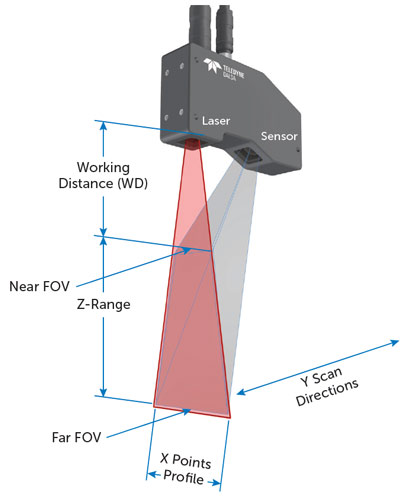
As shown in the diagram below, a laser stripe is projected on the object and imaged on an image sensor. The sensor processes the position of the laser stripe to provide lateral and depth information for the X and Z axis data. By moving the object in the Y-Scan direction the Y-axis data point is provided then giving full X, Y & Z dimensional information.
|
Model | LP1-1010-B2 | LP1-1040-B2 | LP1-1060-B2 |
|---|---|---|---|---|
| Measurement Range (MR ) (mm/in) | 10/0.394 | 40 / 1.575 | 60 / 2.362 | |
| Working Distance (mm/in) | 36 / 1.417 | 45 / 1.772 | 66 / 2.598 | |
| Field of View (X)(mm/in) | 8.4–9.8 / 0.331–0.386 | 20–27.6 / 0.787–1.087 | 25.7–39 / 1.012–1.535 | |
| Profile Rate (profiles/sec) | up to 3.3K using ROI | |||
| Repeatability1 (µm/in) | 0.2–0.3 / 0.000008–0.000012 | 0.4–0.6 / 0.000016–0.000024 | 0.5–0.7 / 0.00002–0.000028 | |
| Linearity2 ± | < 0.025% | < 0.02% | < 0.02% | |
| X Res (µm/in) | 8.6–10 / 0.00034–0.00039 | 20–28 / 0.000787–0.001102 | 26–40 / 0.001024–0.001575 | |
| Laser3 (nm) | Blue:405 | |||
| Laser Safety Class | 2M | |||
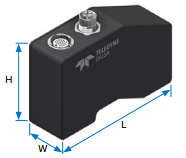
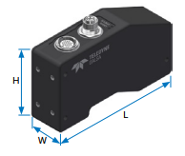
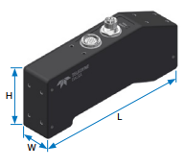
| Case Style (mm) | X10 mm: 36(W); 84.8(H); 125.8(L) in: 1.4(W); 3.3(H); 5.0(L) | X20 mm: 36(W); 78.4(H); 138.6(L) in: 1.4(W); 3.1(H); 5.5(L) | X20 mm: 36(W) x 78.4(H) x 138.6(L) in: 1.4(W) x 3.1(H) x 5.5(L) | |
|
Model | LP1-1120-R2 | LP1-1200-R2 | LP1-1250-R2 |
|---|---|---|---|---|
| Measurement Range (MR ) (mm/in) | 120 / 4.724 | 200 / 7.874 | 250 / 9.843 | |
| Working Distance (mm/in) | 86 / 3.386 | 150 / 5.906 | 175 / 6.89 | |
| Field of View (X)(mm/in) | 42.8–80.8 / 1.685–3.181 | 63.7–134.9 / 2.508–5.311 | 132–268 / 5.197–10.551 | |
| Profile Rate (profiles/sec) | 3.3K using ROI | |||
| Repeatability1 (µm/in) | 1.5–3 / 0.000059–0.000118 | 0.7–1.5 / 0.000028–0.000059 | 1–4 / 0.000039–0.000157 | |
| Linearity2 ± | < 0.01% | |||
| X Res (µm/in) | 44–83 / 0.001732–0.003268 | 65–139 / 0.002559–0.005472 | 137–275 / 0.005–0.011 | |
| Laser3 (nm) | Red:660 | |||
| Laser Safety Class | 2M | |||
| Case Style (mm) | X20 mm: 36(W); 78.4(H); 138.6(L) in: 1.4(W); 3.1(H); 5.5(L) | X20 mm: 36(W); 78.4(H); 138.6(L) in: 1.4(W); 3.1(H); 5.5(L) | X30 mm: 36(W) x 78.4(H) x 189.6(L) in: 1.4(W) x 3.1(H) x 7.5(L) | |
|
Model | LP1-1400-R3 | LP1-1800-R3 | LP1-11100-R3 |
|---|---|---|---|---|
| Measurement Range (MR ) (mm/in) | 400 / 15.748 | 800 / 31.496 | 1100 / 43.307 | |
| Working Distance (mm/in) | 250 / 9.843 | 400 / 15.748 | 300 / 11.811 | |
| Field of View (X)(mm/in) | 223–520 / 8.78–20.472 | 400–1045 / 15.748–41.142 | 411–1520 / 16.181–59.843 | |
| Profile Rate (profiles/sec) | up to 3.3K using ROI | |||
| Repeatability1 (µm/in) | 2–8 / 0.000079–0.000315 | 4–12 / 0.000157–0.000472 | 5–20 / 0.000197–0.000787 | |
| Linearity2 ± | < 0.01% | |||
| X Res (µm/in) | 229–535 / 0.009–0.021 | 410–1075 / 0.016–0.042 | 423–1563 / 0.017–0.062 | |
| Laser3 (nm) | Red:660 | |||
| Laser Safety Class | 3R | |||
| Case Style (mm) | X30 mm: 36(W) x 78.4(H) x 189.6(L) in: 1.4(W) x 3.1(H) x 7.5(L) | X40 mm: 36(W) x 77.7(H) x 287.7(L) in: 1.4(W) x 3.0(H) x 11.3(L) | X40 mm: 36(W) x 77.7(H) x 287.7(L) in: 1.4(W) x 3.0(H) x 11.3(L) | |
1 - Mean ±2*σ
2 - As a % of full scale
3 - Contact 1stVision for other laser options