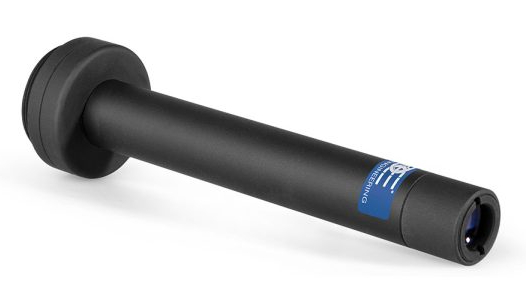
Opto Engineering MC Macro Lenses
Macro lenses with nearly zero distortion for sensors up to 2/3"

Opto Engineering MC Macro lens Opto Engingeering MC macro lenses are optimized for sensors up to 2/3". MC macro lenses are a high quality, high resolution, cost effective solution for industrial machine vision macro applications such as inspection and parts positioning where even the smallest details can be captured with near zero distortion. MC macro lenses are available in magnifications from 0.1x to 6x, and feature a compact size (15 mm outer diameter) to fit in tight spaces.

  • Designed for sensors up to 2/3"
  • Near zero distortion*
  • Compact macro lens - 15 mm outer diameter
  • High resolution

Opto Engineering macro lenses work with a variety of sensor sizes, and are available in a wide range of magnifications. Our Sales Engineers can provide expert advice and guidance on selecting the right lens for your machine vision macro imaging application. Please contact us if you would like more information.

*Image distortion is the percent deviation of the real image acquired by the optics compared to an ideal, undistorted image. Our macro lenses feature "Nearly Zero Distortion", which means that although perfection is hardly reachable, the maximum distortion is designed to be as close to zero as possible.


Product User Guide
Get
Quote
Part
number
Main optical specifications Object field of view Advanced optical specifications Mechanical specifications Data
Sheet
Mag.Image
circle
diameter
Max
sensor
size
1/3”1/2”2/3”Working
distance
ƒ/NWorking
ƒ/N
DistortionDepth
of
field
MountLengthOuter
diameter
  4.80 x 3.606.40 x 4.808.50 x 7.09
(x)(mm)(mm × mm)(mm × mm)(mm × mm)(mm)(%)(mm)(mm)(mm)
12346
MC010X0.1112/3"48.00 x 36.0064.00 x 48.0085.00 x 70.90292.55.35.9< 0.1030.5C24.530Download datasheet
MC020X0.2112/3"24.00 x 18.0032.00 x 24.0042.50 x 35.45158.35.36.4< 0.078.3C27.430Download datasheet
MC033X0.333112/3"14.41 x 10.8119.22 x 14.4125.53 x 21.291035.37< 0.053.3C31.130Download datasheet
MC040X0.4112/3"12.00 x 9.0016.00 x 12.0021.25 x 17.73905.37.5< 0.052.4C32.930Download datasheet
MC050X0.5112/3"9.60 x 7.2012.80 x 9.6017.00 x 14.1874.85.38< 0.021.7C35.730Download datasheet
MC075X0.75112/3"6.40 x 4.808.53 x 6.4011.33 x 9.4555.95.39< 0.020.8C42.830Download datasheet
MC100X1112/3"4.80 x 3.606.40 x 4.808.50 x 7.0946.55.311< 0.010.6C49.930Download datasheet
MC150X1.5112/3"3.20 x 2.404.27 x 3.205.67 x 4.7337.35.313< 0.010.3C6430Download datasheet
MC200X2112/3"2.40 x 1.803.20 x 2.404.25 x 3.5532.55.316< 0.010.2C78.130Download datasheet
MC300X3112/3"1.60 x 1.202.13 x 1.602.83 x 2.3627.85.321< 0.010.1C106.530Download datasheet
MC400X4112/3"1.20 x 0.901.60 x 1.202.13 x 1.7725.45.327< 0.020.1C134.930Download datasheet
MC500X5112/3"0.96 x 0.721.28 x 0.961.70 x 1.42245.332< 0.020.1C163.930Download datasheet
MC600X6112/3"0.80 x 0.601.07 x 0.801.42 x 1.18235.338< 0.020.1C192.830Download datasheet

Notes

  1. Working distance: distance between the front end of the mechanics and the object. Set this distance within ±3% of the nominal value for maximum resolution and minimum distortion.
  2. Working f-number (wf/N): the real f-number of a lens in operating conditions.
  3. Percent deviation of the real image compared to an ideal, undistorted image.
  4. At the borders of the field depth the image can be still used for measurement but, to get a very sharp image, only half of the nominal field depth should be considered. Pixel size used for calculation is 3.45 μm.
  5. Object side, calculated with the Rayleigh criterion with λ= 520 nm
  6. Measured from the front end of the mechanics to the camera flange.