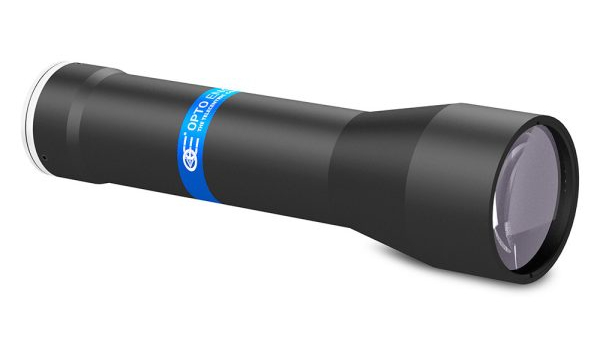
Opto Engineering TCLWD3M Telecentric Lenses
fixed working distance telecentric lenses for sensors up to 1.1"

Opto Engineering TCLWD3M telecentric lens with a fixed working distance for sensors up to 1.1" Opto Engineering TCLWD3M lenses are specifically designed for electronic and semiconductor Automated Optical Inspection (AOI) and tool pre-setting machines. These high-resolution fixed working distance telecentric lenses feature a long working distance that provides extra space for illumination, pick-up tools, or separation from hazardous production processes.

TCLWD3M telecentric lenses, with a large numerical aperture, provide superior image quality and high resolution. These lenses are optimized for sensors with wide image circles up to 1.1" and are ideal for many general purpose 2D measurement applications. They are compatible with high-resolution/small pixel size cameras, due to their large numerical aperture.

  • Wide image circle for sensors up to 1.1"
  • Fixed working distance for consistent focus and magnification
  • Long working distance
  • High numerical aperture
  • Magnifications from 0.2 - 1 x
  • Excellent quality/price ratio

Opto Engineering telecentric lenses include a wide variety of lenses for area and line scan cameras. Contact us if you would like help choosing the right lens for your industrial machine vision applications.


Product User Guide Back focal adjustment
Get
Quote
  Main optical specifications Object field of view Advanced optical specifications Mechanical specifications Data
Sheet
Part
number
Mag.Image
circle
diameter
Max
sensor
size
1/1.8”2/3”1.1”Working
distance
Working
ƒ/N
TelecentricityDistortionDepth
of
field
MountPhase
adjustment
LengthFront
diameter
  7.13 x 5.337.13 x 5.3314.16 x 10.37
(x)(mm)(mm × mm)(mm × mm)(mm × mm)(mm(deg)(%)(mm)(mm)(mm)
111234568
TCLWD100-110-3M117.61.1″7.13 x 5.338.50 x 7.0914.16 x 10.3711012< 0.25< 0.150.6CYes19042 Download datasheet
TCLWD080-110-3M0.817.61.1″8.91 x 6.6610.63 x 8.8617.70 x 12.9611012< 0.25< 0.151CYes17542 Download datasheet
TCLWD055-110-3M0.5517.61.1″12.96 x 9.6915.45 x 12.8925.75 x 18.8511010< 0.25< 0.151.7CYes17652 Download datasheet
TCLWD050-110-3M0.517.61.1″14.26 x 10.6617.00 x 14.1828.32 x 20.7411010< 0.25< 0.152.1CYes17052 Download datasheet
TCLWD050-180-3M0.517.61.1″14.26 x 10.6617.00 x 14.1828.32 x 20.7417810< 0.25< 0.152.1CYes19352 Download datasheet
TCLWD040-110-3M0.417.61.1″17.83 x 13.3321.25 x 17.7335.40 x 25.9311010< 0.25< 0.153.2CYes18562 Download datasheet
TCLWD030-110-230.3112/3″23.77 x 17.7728.33 x 23.63ø = 34.5711010< 0.25< 0.155.8CYes17062 Download datasheet
TCLWD030-180-3M0.317.61.1″23.77 x 17.7728.33 x 23.6347.20 x 34.571788< 0.25< 0.154.6CYes20582 Download datasheet
TCLWD020-180-230.2112/3″35.65 x 26.6542.50 x 35.45ø = 51.851788< 0.25< 0.1510.4CYes18482 Download datasheet
TCLWD020-275-230.2112/3″35.65 x 26.6542.50 x 35.45ø = 51.852748< 0.25< 0.1510.4CYes20182 Download datasheet

Notes

  1. Object field of view (mm x mm). For the fields with the indication "Ø =", the image of a circular object of such diameter is fully inscribed into the detector.
  2. Working distance: distance between the front end of the mechanics and the object. Set this distance within ±3% of the nominal value for maximum resolution and minimum distortion.
  3. Working f-number (wf/N): the real f-number of a lens in operating conditions.
  4. Maximum angle between chief rays and optical axis on the object side. Maximum (guaranteed) values are listed.
  5. Percent deviation of the real image compared to an ideal, undistorted image.
  6. At the borders of the field depth the image can be still used for measurement but, to get a very sharp image, only half of the nominal field depth should be considered. Pixel size used for calculation is 3.45 μm.
  7. Object side, calculated with the Rayleigh criterion with λ= 520 nm
  8. Measured from the front end of the mechanics to the camera flange.